


Setup Directions
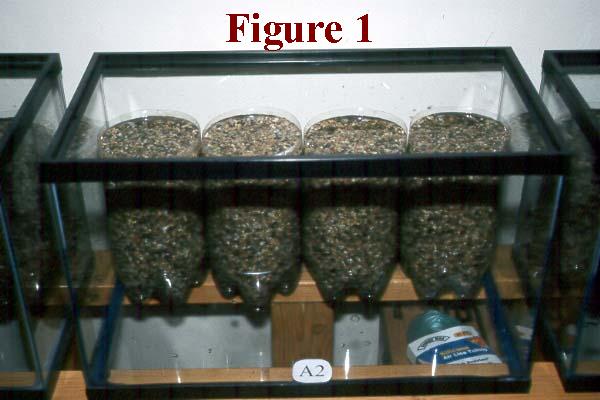 Determine, first of all, where the experimental units will be located and put a ten-gallon aquarium in each of these positions. Then fill four of the 3-liter soda pop bottles, which have had their upper portions removed as described in the setup directions of Experiment #2, to within about 2 cm of their tops with aquarium gravel. Add enough water to these bottles to totally submerge all of the gravel in them, and place them in the back half of the first aquarium, as shown in Figure 1. Then do likewise with each of the other units.
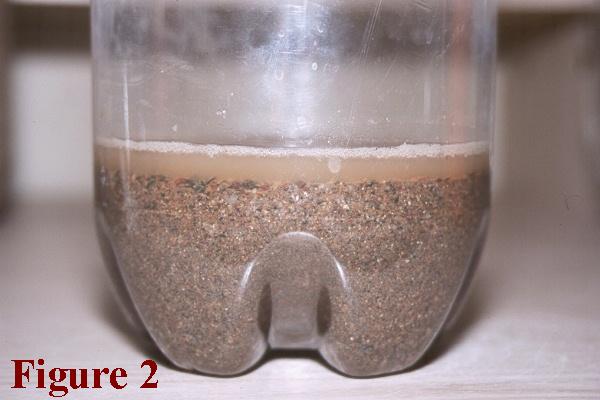 Next, fill each of the remaining 3-liter bottles about a fourth of the way up with sand, and add enough water to totally saturate it, shaking the bottle a bit to compress the sand and leave a shallow layer of water above it, as shown in Figure 2.
 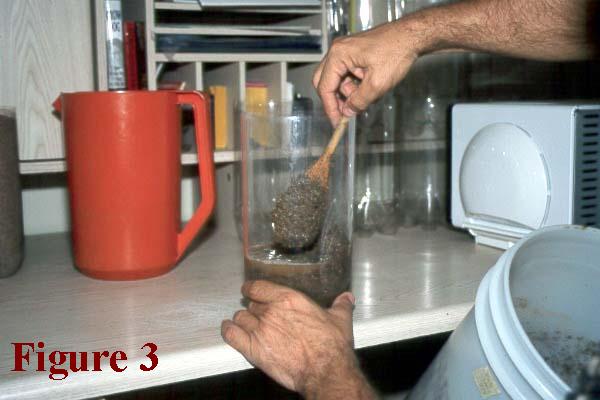 Then pour some new sand into a large bucket and, if necessary, add some water to it and stir with a large wooden or metal spoon to create a moist, but not saturated, mixture. Spoon by spoon, add this moist sand to the quarter-filled bottles, as shown in Figure 3.
 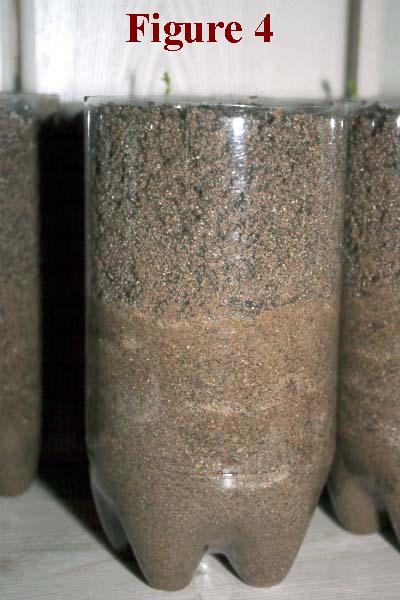 As this is done, some of the added sand will "wick up" the shallow water layer above the saturated sand, and it will become saturated too. However, if the water layer is not too deep, this process will terminate about halfway up the bottle, and the upper half of the bottle's sand will be moist but not saturated, as can be seen by viewing the bottles of Figure 4. It is important that this step be successfully completed; for, in contrast to the Pothos plant, many plants -- and we are guessing that peas fall into this category -- cannot live with their roots totally submersed in a watery medium.
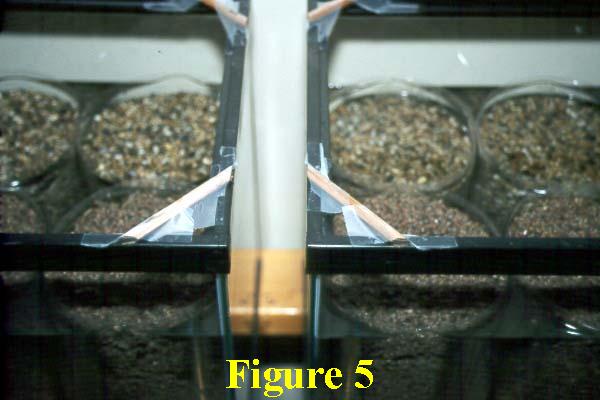 Place four bottles thus filled with moist sand in the front half of each aquarium. Then saw two pencils in half for each unit, preferably with 45-degree cuts through their centers, and make opposing 45-degree cuts at each of the original pencil ends. The resulting pencil halves are to be placed at each of the corners of each aquarium and secured with cellophane tape, as shown in Figure 5.
Now is the time to remove a set of uniform leaves from the Pothos plant, as described in the setup directions of Experiment #1. Place one of these leaves in the center of each of the gravel-filled bottles in the back half of each aquarium. When planting is complete, add sufficient water to each bottle to cover its gravel to a depth of about two centimeters. Then, with a sharpened pencil, make a hole about 3.5 cm deep in the center of each of the sand-filled bottles and drop one pea seed into each hole, covering the seed with the surrounding moist sand. Finally, fill the remaining unoccupied space of each aquarium with water to a level just below the tops of the 3-liter bottles; and, if desired, place a thermometer at the bottom of each tank between the two central bottles of sand where it can be easily read.
Since we expect the peas to grow taller than the distance from the top of the sand to the top of the aquariums in which the 3-liter bottles are located, the remaining aquariums should now be inverted and placed on top of the aquariums that hold the 3-liter bottles, which greatly increases the space available for aboveground plant growth. 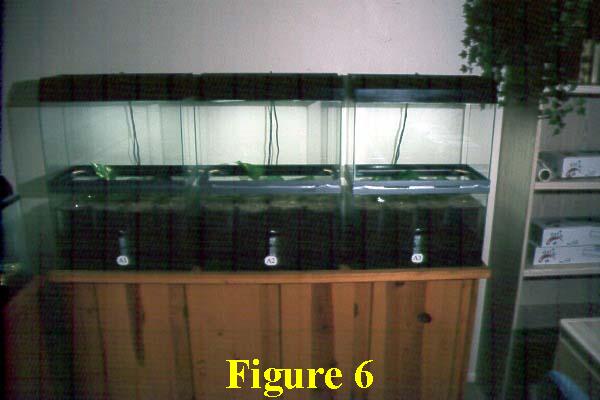 These aquariums should rest upon the pencil halves that are located in each of the upper corners of the lower aquariums. When everything is positioned just right, attach each upper aquarium to the aquarium below it with duct tape, so as to completely cover the space created by the pencils that separate them, thereby isolating the air inside the dual-aquarium units from the air of the room in which they are located. Then put two strip-lights with 15-watt fluorescent bulbs on top of each unit and your experimental setup should look like ours, as portrayed in Figure 6.
The next-to-last thing to be done is to use a sharp pencil to puncture the duct tape in the front of each experimental unit where you want to insert the 30-inch piece of silicone air tubing that will be used to siphon water out of the unit for airspace CO2 concentration determinations. And the last thing to do is to cut a couple of small holes (at opposite ends of the unit) in the duct tape of one of the experimental units where it bridges the gap between the upper and lower aquariums, so as to allow for a small exchange of air between the unit and the room, and to cut a couple of larger such holes in another unit. The CO2 content of the air in this last unit should remain fairly close to that of the air in the room in which the units are located, while the unit with the smaller holes should have a significantly lower airspace CO2 concentration, due to its inability to receive enough CO2 from the room to compensate for that which is being removed by the growth of the Pothos plants. The third totally-sealed unit should ultimately develop a very low CO2 concentration, possibly low enough to actually bring about the death of the emergent pea plants after a few weeks.
At this point, the experiment has almost begun. It actually starts when the pea seeds sprout and the young plants begin to emerge above the sand. When all have appeared, biospheric airspace CO2 concentration measurements should be started, as described in our CO2 Measurement Technique section. These measurements can be made every Monday, Wednesday and Friday.