


Setup Directions
Setup Directions
Each of the 10-gallon aquariums we use in our first experiment needs to be filled to a depth of approximately 18 cm with common aquarium gravel. Before the gravel is placed in the "poor man's biospheres," however, each tank should have a piece of black felt material attached to the lower inside half of its front glass panel.
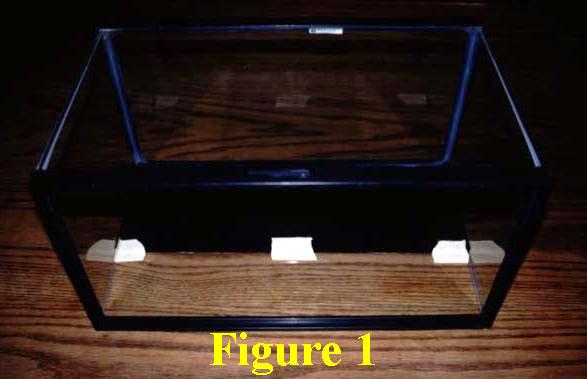 This is best accomplished by setting the aquarium on its front side with its open top facing you, placing the 18- by 50-cm piece of black felt across the bottom half of the front glass panel, and securing its top edge to the tank with masking tape (which will be removed shortly).
 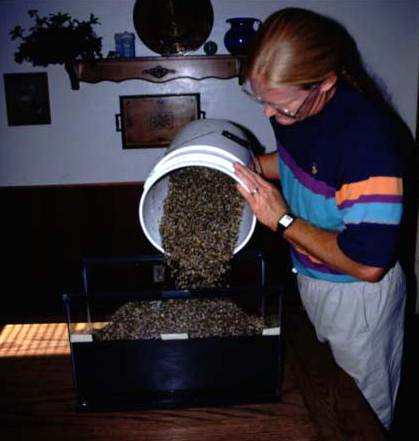 We use three small pieces of tape for this purpose, as shown in Figure 1, but it is probably better to seal the entire top edge; for when gravel is added to the tank, as shown in Figure 2, you do not want any of it to accidentally get between the felt and the front glass panel of the aquarium.
When the aquarium is upright and filled with gravel to about 2 cm below the top edge of the black felt material (which should be done with the tank positioned where it will sit for the duration of the experiment, as the tanks are heavy and more difficult to lift and arrange after the gravel is added to them), the masking tape holding the felt to the front of the glass may be removed. At this stage, you can pull some of the gravel out of the two back corners of the tank and put a glass or plastic water bottle (with its top cut off) about half way down in each depression and then add whatever gravel is needed to bring its smoothed surface to just below the top edge of the black felt. 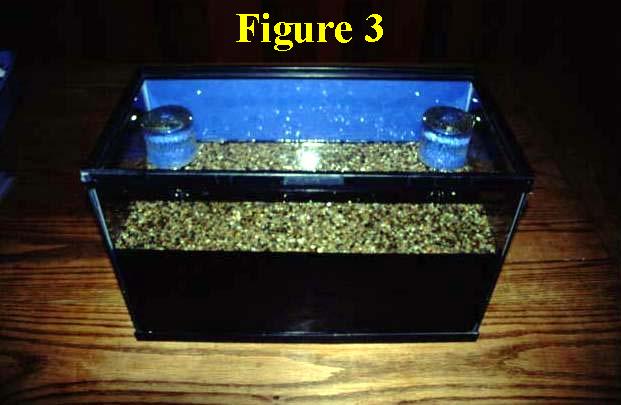 Then you can fill the glasses with tap water and add enough water to the gravel to totally saturate it. This step brings you to the setup stage depicted in Figure 3, where we have also taped a piece of bright blue construction paper to the outer back of the tank purely for aesthetic purposes.
 Now is the time to introduce the experimental plant material into the aquariums. Previously, you should have acquired a few Pothos plants from a local nursery or home supply store.
  You will need enough plants to provide seven leaves for each tank. The leaves should all be of the same size and as uniform as possible. To help meet this criterion, the leaves to be used should not come from the end of a vine.
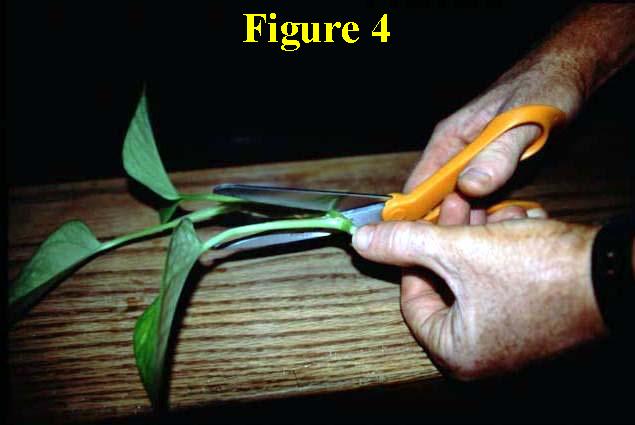
  Instead, select leaves from the central portions of individual vines, making sharp clean cuts through the vine approximately 1 cm on either side of where the leaf stem emerges from the vine, as shown in Figure 4.
 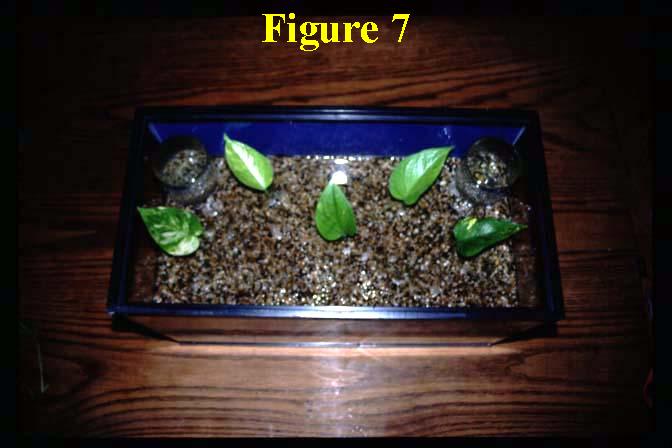 Then, carefully grasping each leaf to protect its lower end from damage (see Figure 5), insert each one into the gravel, as shown in Figure 6, to create the arrangement depicted in Figure 7.
 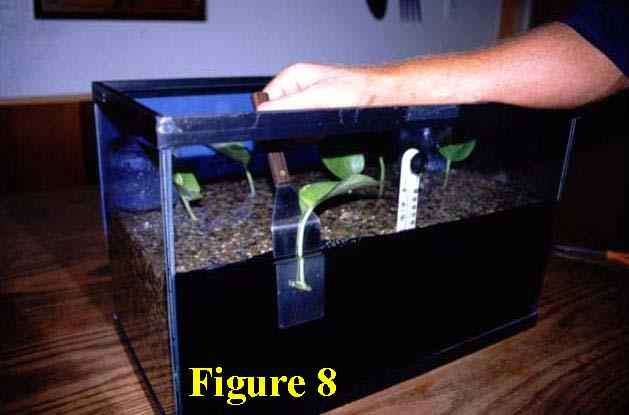 Last of all, using a kitchen spatula, pull back the black felt material from the front glass panel of the aquarium to insert the sixth and seventh leaves between the felt liner and the glass, as shown in Figure 8, where you can also see how we have centrally positioned the tank's thermometer.
 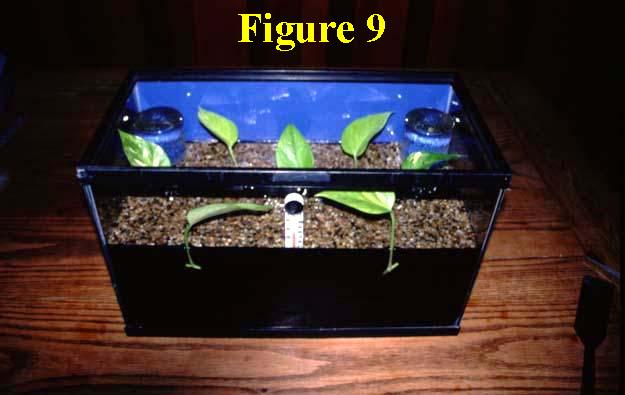 When you have completed this step, each of your tanks should look like the one depicted in Figure 9.
With our Pothos leaves in place, we are ready to cover the tops of the tanks with 4-mil thick clear polyethylene. Cut one sheet to cover each aquarium to the exact size of its outer dimensions, which for most 10-gallon tanks will be approximately 26.5 cm by 51 cm. Place half of a small piece of transparent tape over the back edge of the first plastic sheet at each of its ends and another at the center of the back side. 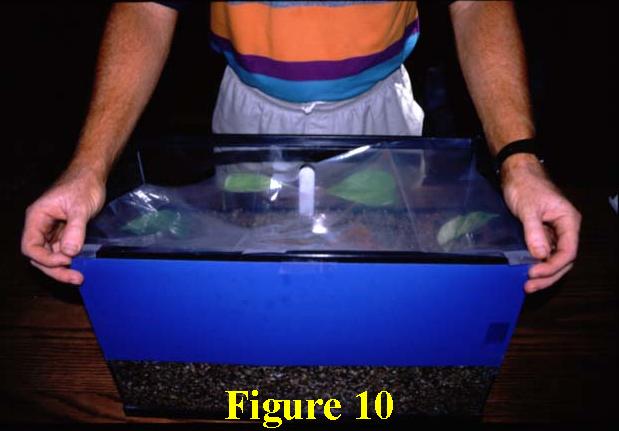 Pick the sheet up with both hands, holding the pieces of tape located at its back corners, and position the back edge of the sheet over the back edge of the tank top, as shown in Figure 10. When properly positioned, tape the two back corners of the plastic sheet to the back edge of the tank. Then secure the middle piece of tape to the tank; and with another small piece of tape, secure the center of the front edge of the plastic sheet to the front of the tank. Finally, secure the front corners of the sheet to the front corners of the tank.
Make any adjustments needed to produce a smooth, tight fit across the top of the aquarium. 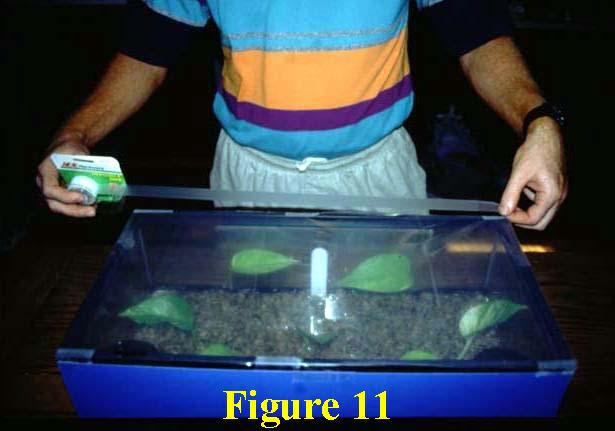 Then take a strip of tape sufficient to extend slightly beyond both ends of the tank (see Figure 11) and run it halfway over the edge of the plastic across the whole back side of the aquarium. Fold the extended half of the tape down over the back side of the tank and press it against the aquarium, making a solid seal across the entire back side of the tank. You could also do this in two steps with two pieces of tape, each half as long, if desired.
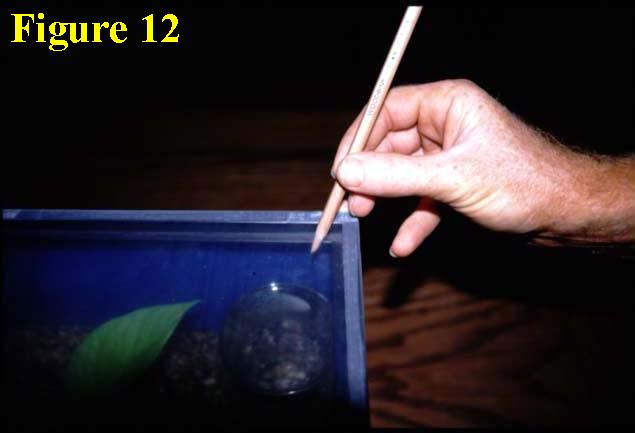 When all sides of the polyethylene sheet covering the top of each tank are tightly sealed, make a small puncture hole in each back corner of the clear polyethylene with a sharp pencil, as shown in Figure 12. Through each of these holes,
  insert the end of some silicone air tubing (the fit should be fairly tight), as shown in Figure 13, and direct it into the glass of water just below. Draw the other end of the tubing toward the front of the tank and cut it, as shown in Figure 14.
 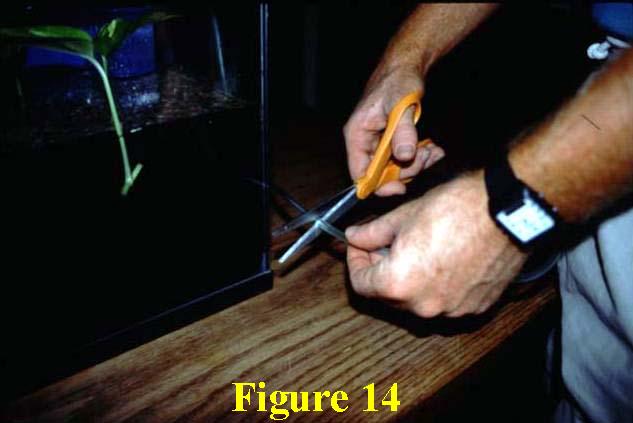 This should give you a sufficient length of tubing to readily siphon water out of the biospheres' glass or plastic-bottle containers when it is time to make biospheric airspace CO2 concentration measurements. Finally, place two strip-light fixtures on the top of each tank, one over its front half and the other over its back half,
 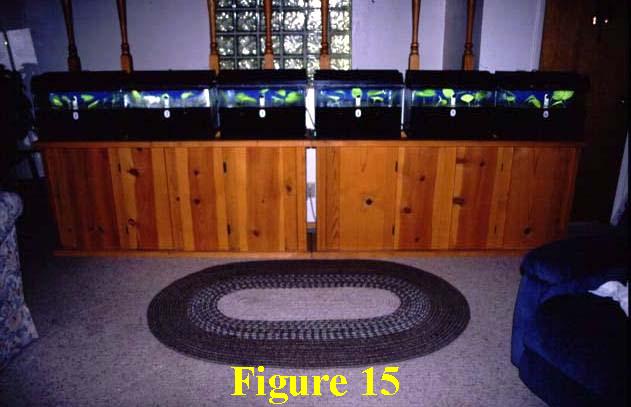 and your experimental set-up should look something like ours in Figure 15, where we have labeled the tanks from 1 to 6 and where we are using two six-receptacle surge protectors into which we plug the twelve power cords from the twelve strip-lights.
Now, viewing the tanks from above, you will see that there is a lane of exposed polyethylene approximately 2 cm wide that runs down the middle of each tank's top between the two lights. In this area of exposed polyethylene on one of the tanks, cut three holes of approximately 2-cm diameter -- one in the middle of the strip and one at each end. This tank will become your highest CO2 treatment, because it will be easy for the high-CO2-content air that is naturally produced by the exhaled breath of people living in a home or students congregating in a classroom to enter into the tank's internal airspace through these holes in its polyethylene cover. In another tank's polyethylene cover, cut two holes (one near each end of the tank) of approximately 1-cm diameter. It will be more difficult for the high-CO2 room-air to enter this tank, and it will have a lower internal airspace CO2 concentration than the tank with the three larger holes in its top. Then, in a third tank, cut two holes of 0.5-cm diameter; and in a fourth tank, cut two holes that are even smaller.
The last two tanks should have no holes cut in their tops. They will become your lowest CO2 treatments; for the photosynthetic activity of the leaves in these tanks will remove so much CO2 from their internal airspaces that the concentration of CO2 within them will drop significantly below that of the outside air of the free atmosphere. In fact, it will drop to the point where it is almost impossible for the plants in these tanks to survive. The reason for treating two tanks in this manner is that the CO2 content of one tank will usually drop a little lower than that of the other, due to the unavoidable variability that is inherent in biological experiments; and when it becomes clear which tank has the lowest internal airspace CO2 concentration, the other tank may have some very small holes made in its top, to create a reasonable CO2 difference between it and the totally sealed tank.
At this stage, the experiment has essentially begun; and it is time to start measuring the CO2 contents of your poor man's biospheres' internal airspaces. Although this procedure is fairly simple, there are a lot of things you need to know about it in order to be successful in the endeavor. Hence, we direct you to visit the CO2 Measurement Technique section of our Global Change Laboratory for detailed instructions.